· MikroTik Tutorial · 3 min read
MikroTik Tutorial: How to enable DNS over HTTPS (DoH)
In this MikroTik Tutorial I will show you how to configure DNS over HTTPS on your MikroTik router using either Cloudflare DNS servers or Google DNS servers. The latest stable version of RouterOS 6.47...
This post was originally published on jcutrer.com (WordPress) and has been migrated to the archive.
In this MikroTik Tutorial I will show you how to configure DNS over HTTPS on your MikroTik router using either Cloudflare DNS servers or Google DNS servers.
The latest stable version of RouterOS 6.47 adds support for DNS over HTTPS or DoH. DoH is a protocol for performing remote DNS over HTTPS protocol. It is similar to DoT (DNS over TLS) but not exactly the same.
DNS Queries over HTTPS (DoH) is an accept IETF standard RFC8484.
DNS over HTTPS (DoH) is a protocol for performing remote Domain Name System (DNS) resolution via the HTTPS protocol. A goal of the method is to increase user privacy and security by preventing eavesdropping and manipulation of DNS data by man-in-the-middle attacks[1] by using the HTTPS protocol to encrypt the data between the DoH client and the DoH-based DNS resolver.(https://en.wikipedia.org/wiki/DNS_over_HTTPS)
UPDATE: RouterOS v6.47 was released to the stable channel on June 2nd 2020 with DNS over HTTPS support. I used a RB4011 router running RouterOS v6.47beta60 during testing. You will see 6.47beta60 referenced in the screenshot below but I recommend using the stable channel.
Steps to Configure DNS over HTTPS on a MikroTik Router
Time needed: 2 minutes.
- Upgrade to RouterOS v6.47 available in the stable channel.
System | Packages | Check for Updates 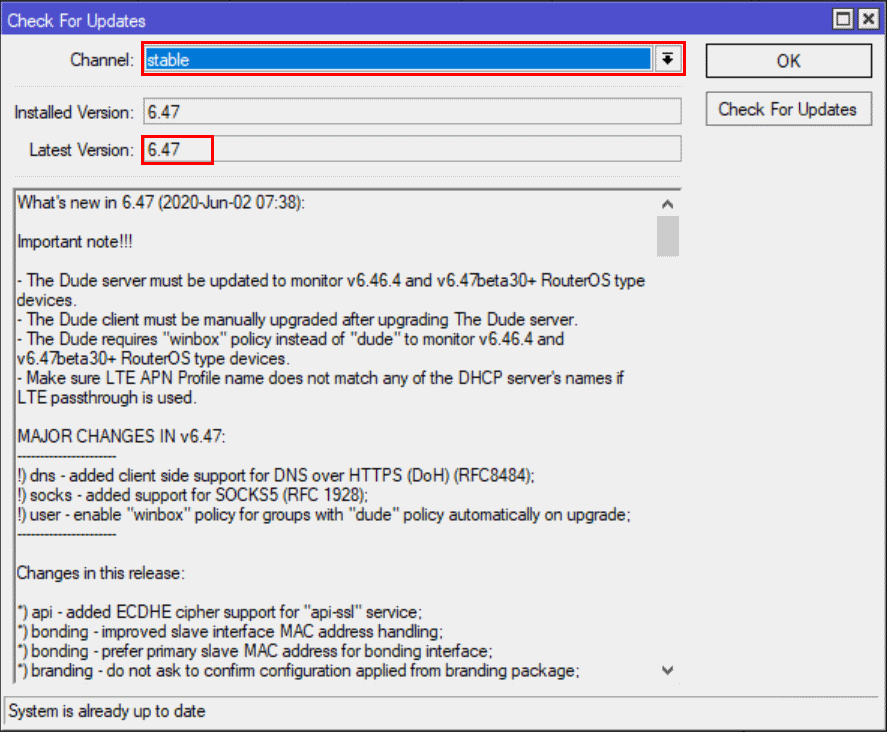 - Download and Import root certificates
/tool fetch url=https://curl.haxx.se/ca/cacert.pem /certificate import file-name=cacert.pem passphrase="" 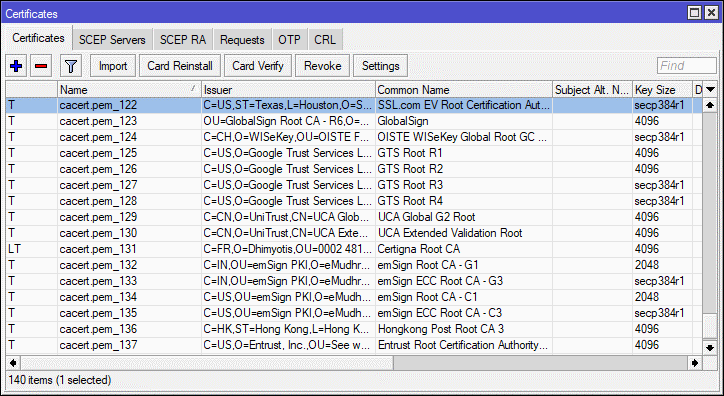 - Remove DNS Servers
In winbox open IP | DNS, remove existing Servers - Add a static DNS entry for the DoH hostname.
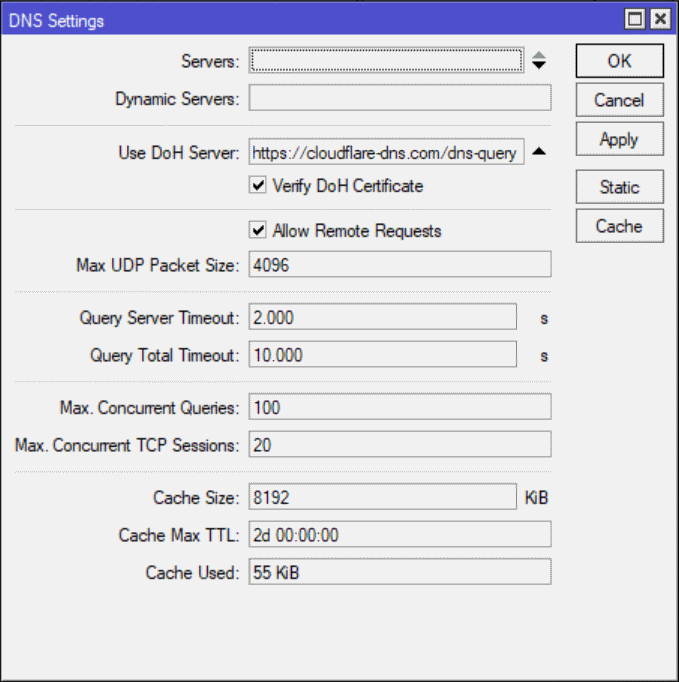
IP | DNS | Static | + Add 2 Static DNS Entries for cloudflare-dns.com to Address: 104.16.248**.249** and 104.16.249.249. If you plan on using Google add dns.google pointing to 8.8.8.8 and 8.8.4.4. 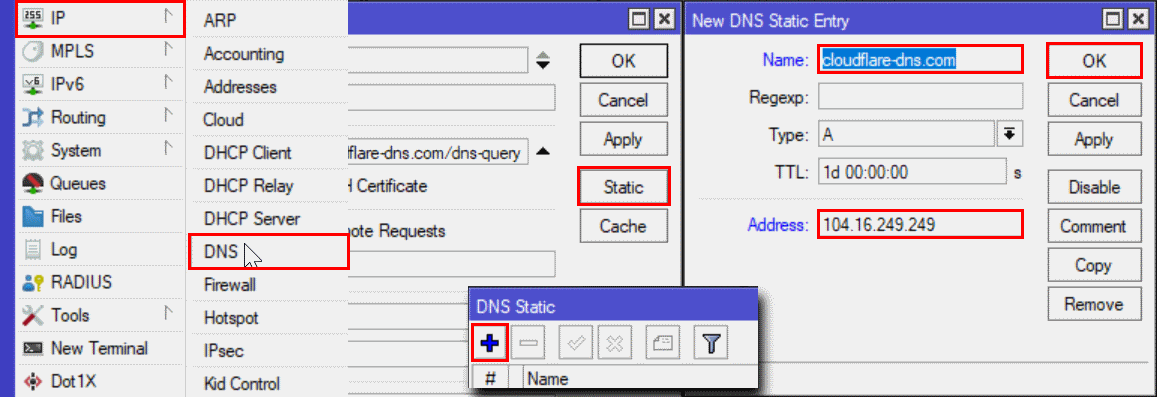 - Add providers url to “Use DoH Server” and check the box “Verify DoH Certificate”
For cloudflare I added https://cloudflare-dns.com/dns-query
Verify that DoH is enabled and working
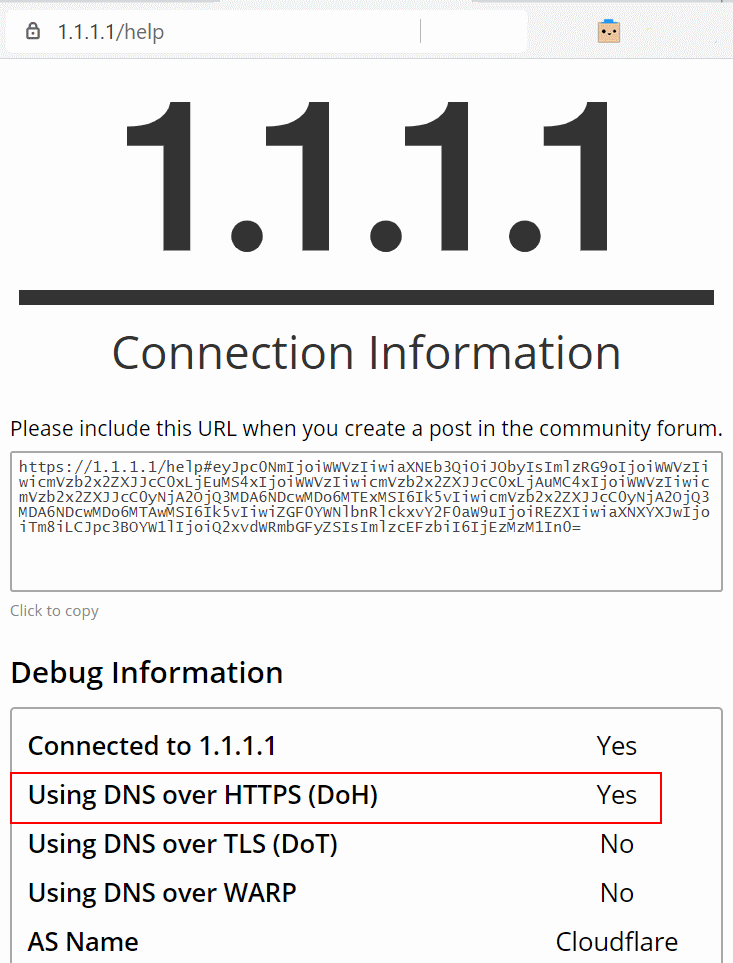
Cloudflare has provided a simple web status page at (https://1.1.1.1/help) to verify that you have configured DNS over HTTPS properly.
Configure Cloudflare DNS over HTTPS resolver
The resolver url for Cloudflare is https://cloudflare-dns.com/dns-query as show in the screenshot above.
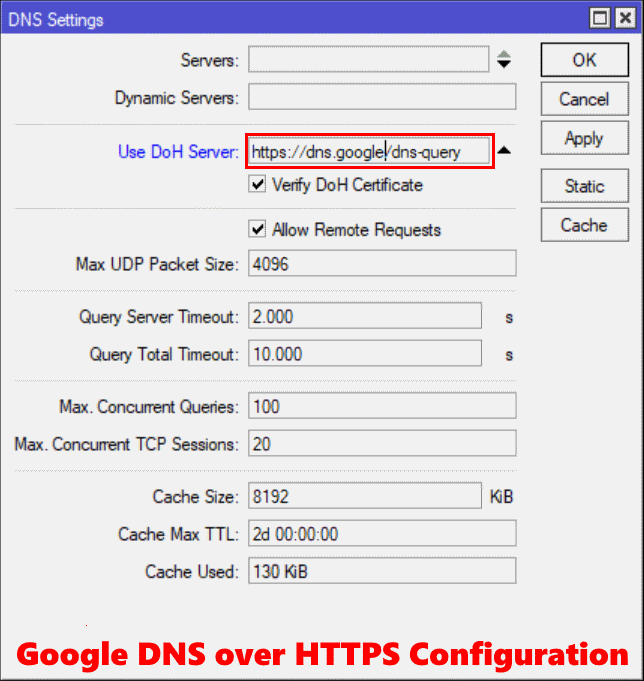
Configure Google’s DNS over HTTPS resolver
The resolver url for Google is https://dns.google/dns-query as show in the screenshot below.
Error Messages & Troubleshooting
dns, error DoH server connection error: SSL: handshake failed: unable to get local issuer certificate (6)
This error is a result of not having root certificates installed to validate the https certificate of the DNS server url.
dns, error DoH server connection error: resolving error
This error is a result of entering only an IP address in the Use DoH Server field. It should be entered as a https:// url.
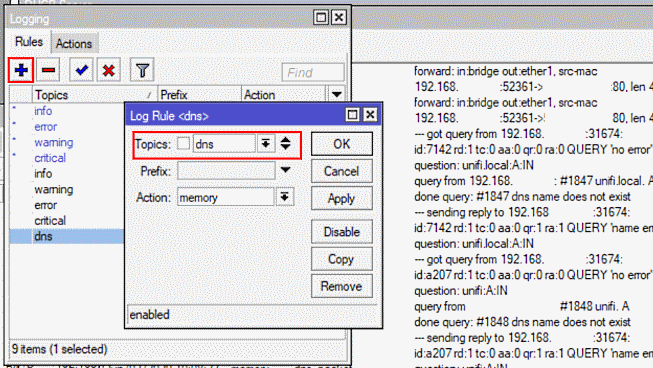
Enable DNS debug logging
Another way to see what is going on with dns queries on your MikroTik router is to enable DNS logging.
Verify DoH is working with Torch
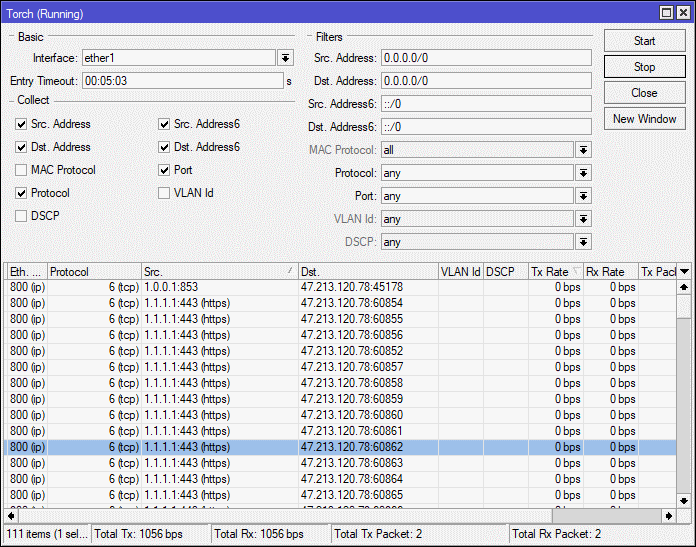
To verify that DoH is configured and working run torch on your WAN interface and verify you see no udp or tcp connections to DNS port 53. In my configuration to cloudflare I can see multiple https connection to 1.1.1.1.
Now you have DNS over HTTPS configured on your MikroTik Router. I hope you have enjoyed this howto article, you can find many more (/howto/networking/mikrotik/).
Did this work for you? Let me know in the comments section below.
More MikroTik Articles
Comments are disabled (Giscus not yet configured).