· MikroTik Tutorial · 1 min read
MikroTik Tutorial: Adding a 2nd Wireless SSID Virtual Access Point
How to configure a VirtualAP in RouterOS This example assumes you are starting with the RouterOS default configuration. The screenshots below detail the steps required to add a second access point to...
This post was originally published on jcutrer.com (WordPress) and has been migrated to the archive.
How to configure a VirtualAP in RouterOS
This example assumes you are starting with the RouterOS default configuration. The screenshots below detail the steps required to add a second access point to a MikroTik router. This quick tutorial does not address the setup steps required to secure your wireless network WPA/WPA2 wireless authentication.
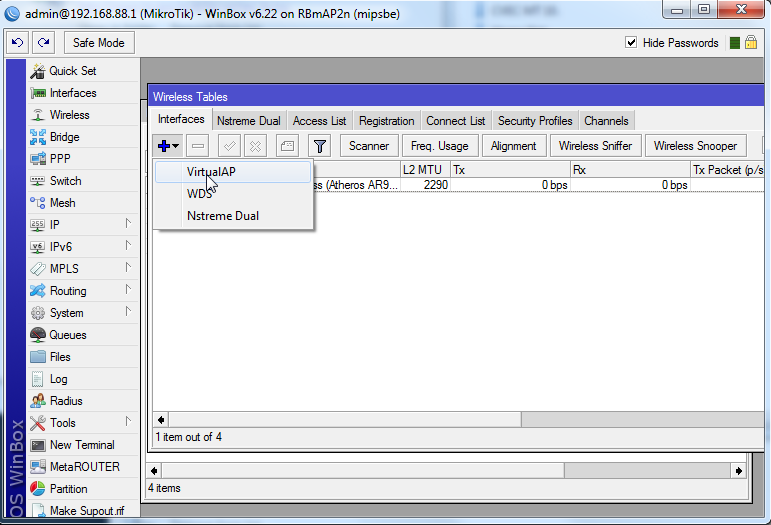
Click Wireless from the left menu, Click Add and choose VirtualAP !(/wp-content/uploads/2014/12/mikrotik-virtual-access-point-step01.png)
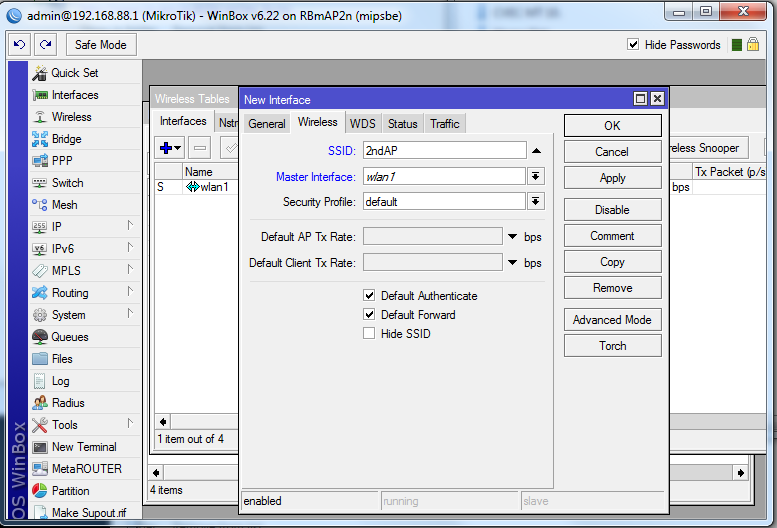
Enter the SSID name your would like the 2nd wireless network to appear as. !(/wp-content/uploads/2014/12/mikrotik-virtual-access-point-step02.png)
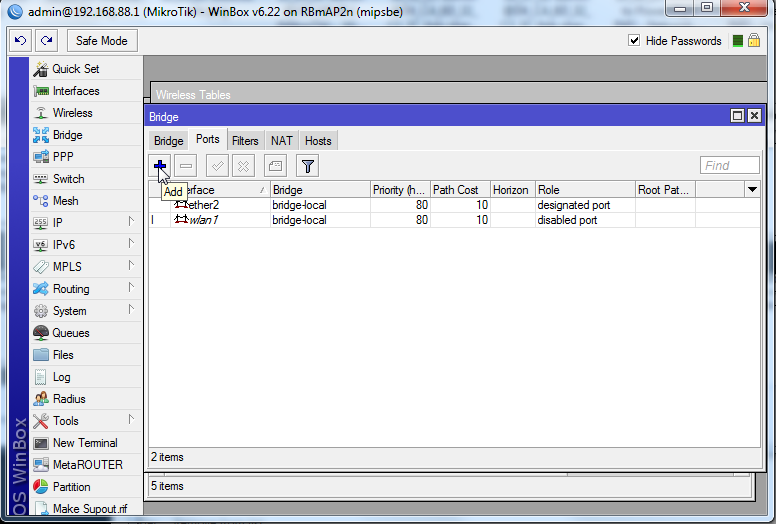
Click Bridge from the left menu and then click the “Ports” tab. Click Add !(/wp-content/uploads/2014/12/mikrotik-virtual-access-point-step03.png)
Choose the newly created VAP interface and add it to the “bridge-local” bridge.
Now you will see 2 SSIDs presented by the Mikrotik Router from a single wireless interface.
!(/wp-content/uploads/2014/12/mikrotik-virtual-access-point-step01.png)
!(http://blog.jcutrer.com/wp-content/uploads/2014/12/mikrotik-virtual-access-point-step02.png)

!(/wp-content/uploads/2014/12/mikrotik-virtual-access-point-step03.png)
!(/wp-content/uploads/2014/12/mikrotik-virtual-access-point-step04.png)
!(/wp-content/uploads/2014/12/mikrotik-virtual-access-point-wireless-networks.png)
I hope you found this MikroTik Tutorial on VirtualAP useful. If it helped you out, please leave a comment below and checkout my other (/howto/networking/mikrotik/)!
Comments are disabled (Giscus not yet configured).