· MikroTik Tutorial · 3 min read
MikroTik Tutorial: RouterOS SSH Public Key Auth using RSA keys
A Step-by-Step guide to configure SSH Public Key Authentication on a MikroTik router using an RSA keys In RouterOS 6.31, MikroTik introduced support for RSA keys for authentication so I decided to...
This post was originally published on jcutrer.com (WordPress) and has been migrated to the archive.
A Step-by-Step guide to configure SSH Public Key Authentication on a MikroTik router using an RSA keys
**In RouterOS 6.31, MikroTik introduced support for RSA keys for authentication so I decided to give it a test. SSH Public Key Authentication on RouterOS using DSA keys has been supported for a long while. This MikroTik tutorial will guide you through the process of configuring authentication with RSA keys. This tutorial is really three articles in one, pick the one that fits your environment. (#linux), (#putty), or (#securecrt).
!(http://jcutrer.com/wp-content/uploads/2015/09/ubuntu-icon.png) Generate an RSA key pair on ubuntu linux

!(http://jcutrer.com/wp-content/uploads/2015/09/ubuntu-icon.png) Step 1: Run ssh-keygen
user@linux:~$ ssh-keygen -t rsa

Generating public/private rsa key pair.
Enter file in which to save the key (/home/osboxes/.ssh/id_rsa):
Created directory '/home/osboxes/.ssh'.
Enter passphrase (empty for no passphrase):
Enter same passphrase again:
Your identification has been saved in /home/osboxes/.ssh/id_rsa.
Your public key has been saved in /home/osboxes/.ssh/id_rsa.pub.
The key fingerprint is:
8e:1e:a0:85:b9:1f:f4:80:a8:89:cd:a8:ae:99:db:48 osboxes@osboxes
The key's randomart image is:
+-------+
|                 |
|                 |
|                 |
| . +             |
|. + =   S        |
|o= = + o         |
|=E= . + .        |
|o= . o .         |
|Xo. . .          |
+-----------------+!(http://jcutrer.com/wp-content/uploads/2015/09/ubuntu-icon.png) Step 2: Copy the public key to the MikroTik router
user@linux:~$ scp ~/.ssh/id_rsa.pub admin@192.168.1.99:mykey.pub

The authenticity of host '192.168.1.99 (192.168.1.99)' can't be established.
RSA key fingerprint is aa:25:f6:25:12:f1:57:9b:97:1c:b6:af:dd:f2:97:e4.
Are you sure you want to continue connecting (yes/no)? yes
Warning: Permanently added '192.168.1.99' (RSA) to the list of known hosts.
admin@192.168.1.99's password:
id_rsa.pub                                       100%  397     0.4KB/s   00:00
Next, (#installkey)
 Generate an RSA key pair using SecureCRT (Windows)
Important ** If you have already created a private/public key in the past using SecureCRT make sure you backup your keys or just use the existing key pair. You have been warned.
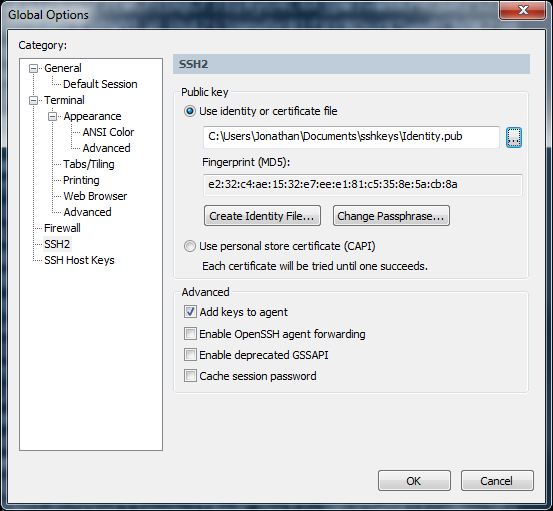
!(http://jcutrer.com/wp-content/uploads/2015/09/2015-09-10-06_33_50-192.168.171.128-SecureCRT.png) Before you start, choose “Options | Global Options | SSH2” from the menu to see if you have already generated and configured a SSH key pair.
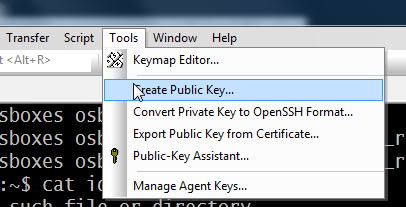
!(http://jcutrer.com/wp-content/uploads/2015/09/2015-09-10-06_29_51-192.168.171.128-SecureCRT-e1441885024652.png) Choose “Tools | Create Public Key…”
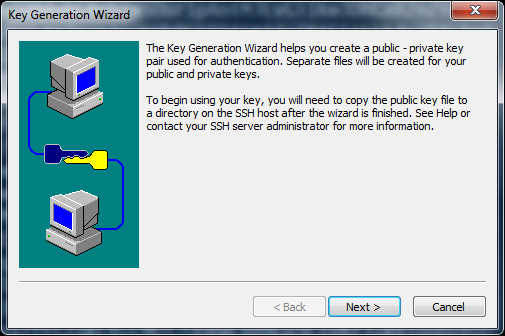
!(http://jcutrer.com/wp-content/uploads/2015/09/2015-09-10-06_30_04-192.168.171.128-SecureCRT.png) Click “Next”
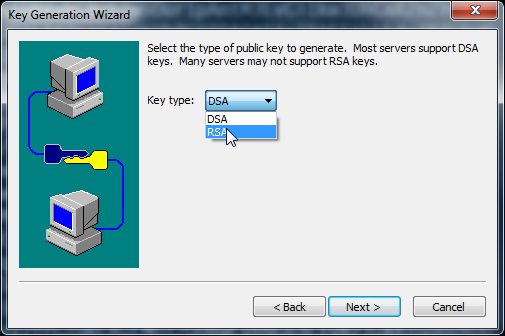
!(http://jcutrer.com/wp-content/uploads/2015/09/2015-09-10-06_30_16-192.168.171.128-SecureCRT.png) Choose between DSA and RSA key generation, RSA for this tutorial.
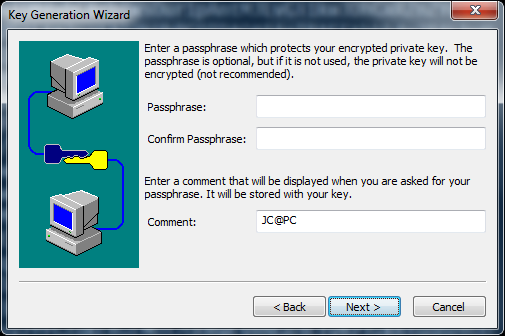
!(http://jcutrer.com/wp-content/uploads/2015/09/2015-09-10-06_30_41-192.168.171.128-SecureCRT.png) Leave Passphrase blank for true passwordless authentication
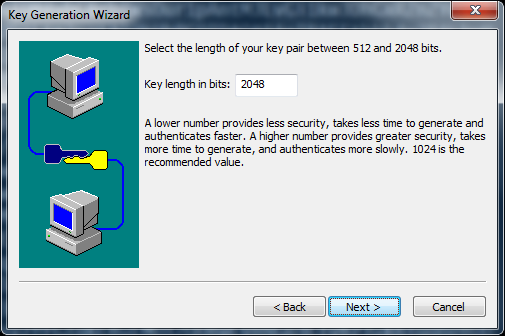
!(http://jcutrer.com/wp-content/uploads/2015/09/2015-09-10-06_31_12-192.168.171.128-SecureCRT.png) Use a key length of 2048
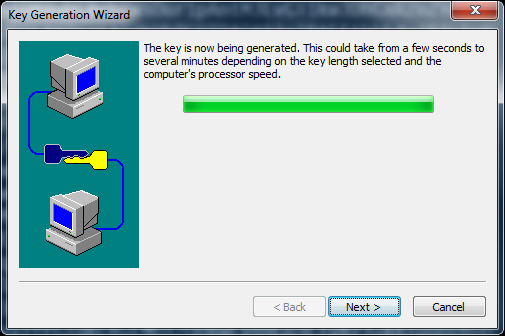
!(http://jcutrer.com/wp-content/uploads/2015/09/2015-09-10-06_31_29-192.168.171.128-SecureCRT.png) Click “Next” after the RSA key is generated
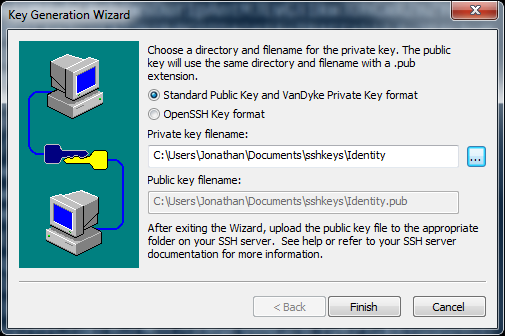
!(http://jcutrer.com/wp-content/uploads/2015/09/2015-09-10-06_32_38-192.168.171.128-SecureCRT.png) Choose where to save your key pair, I created a folder in My Documents named “sshkeys”.
Next, (#installkey)
!(http://jcutrer.com/wp-content/uploads/2015/09/Putty-Icon.png) Generate SSH Key pair using PuTTY’s puttygen.exe (Windows)

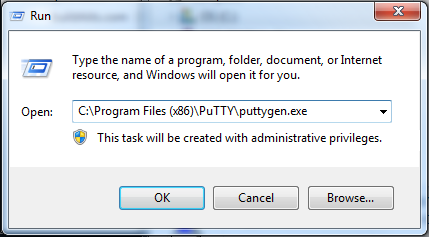
!(http://jcutrer.com/wp-content/uploads/2015/09/2015-09-10-08_11_13-putty.exe-Search-Results-in-OS-C_.png) Click “Start | Run” and launch “C:\Program Files (x86)\PuTTY\puttygen.exe”
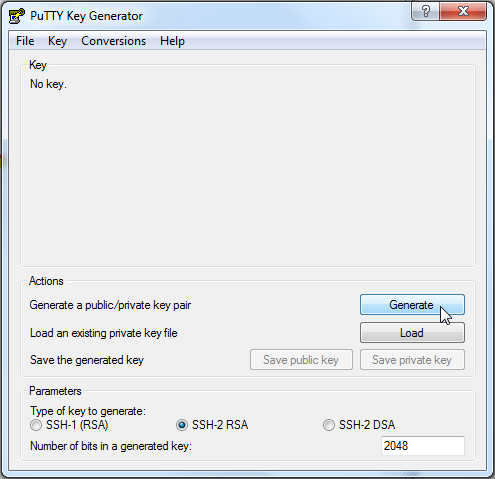
!(http://jcutrer.com/wp-content/uploads/2015/09/2015-09-10-08_06_03-putty-generate-ssh-key-Google-Search.png) Ensure that key type is “SSH-2 (RSA)” and key length is “2048”. Click “Generate”.
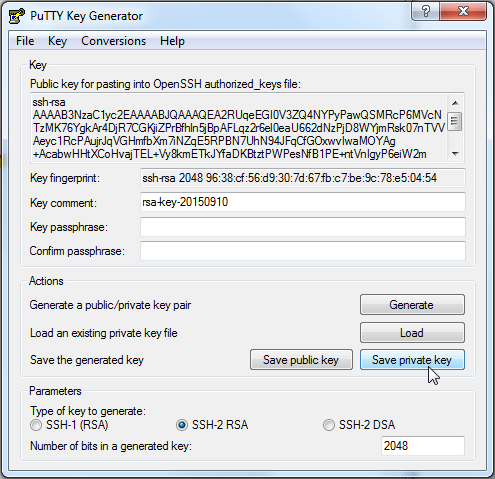
!(http://jcutrer.com/wp-content/uploads/2015/09/2015-09-10-08_06_48-putty-generate-ssh-key-Google-Search.png) Click “Save private key” and “Save public key” to save each. I saved them to My Documents\sshkeys and named the public key “puttykey.pub”.
!(http://jcutrer.com/wp-content/uploads/2015/09/winbox-icon.png) Install the Public RSA key and associate it with a user

!(http://jcutrer.com/wp-content/uploads/2015/09/winbox-icon.png) Step 1: Use winbox to verify that the file was copied to the router
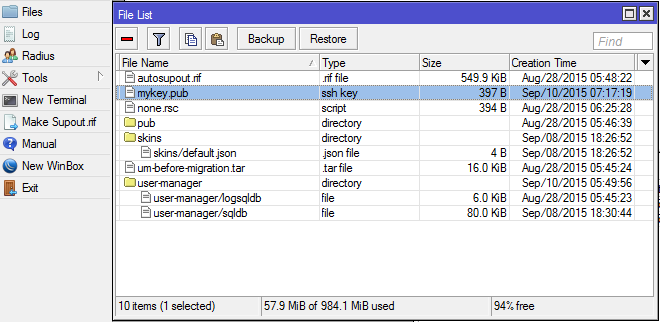
!(http://jcutrer.com/wp-content/uploads/2015/09/winbox-icon.png) Step 2a: Import the public key using Winbox
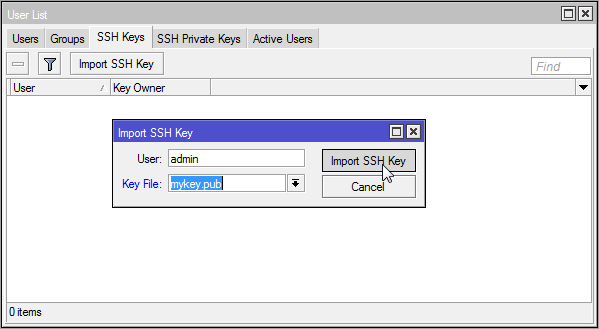
!(http://jcutrer.com/wp-content/uploads/2015/09/winbox-icon.png) Step 2b: Import the public key from the command line
> /user ssh-keys import public-key-file=mykey.pub user=adminTo verify…
 > /user ssh-keys print

Flags: R - RSA, D - DSA
 #   USER                       BITS KEY-OWNER
 0 R admin                      2048 admin@host
Test your configuration by connecting with SSH
user@linux:~nbsp;ssh admin@192.168.1.99 >Look, no password prompt!
How to export router’s configuration using SSH
user@linux:~nbsp;ssh admin@192.168.1.99 /export > myconfig.rsc user@linux:~nbsp;head myconfig.rsc # sep/10/2015 10:46:44 by RouterOS 6.31 # software id = 0340-0M77 # /ip address add address=192.168.1.99/24 interface=ether1 network=192.168.1.0 /ip dhcp-client add dhcp-options=hostname,clientid interface=ether1 ...Again, no password prompt!
How to create a binary backup and transfer using scp
user@linux:~$ ssh admin@192.168.1.99 /system backup save name=myrouter.backup
Configuration backup saved

user@linux:~$ scp admin@192.168.1.99:/myrouter.backup ./
myrouter.backup 100% 18KB 18.1KB/s 00:00

user@linux:~$ ls -al myrouter.backup
-rw-r----- 1 osboxes osboxes 18573 Sep 11 04:35 myrouter.backup
Video Tutorials (Coming Soon)
References
Comments are disabled (Giscus not yet configured).